Most operations on objects can be performed using tools from the Inspector window or the program menu. Some of them - by using the context menu.
Moving Objects
Move objects with the mouse by dragging them.
For precise movement, select an object and use the arrow keys on the keyboard. For faster movement press Shift+[Arrow key].
On the Geometry tab you can enter the coordinates of an object to place it exactly where it is needed on the page. The units of measure can be changed in the program's Preferences.
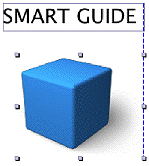
When you move an object with the mouse, it snaps automatically to another object's edge. You may toggle the Snap function on or off if you hold down the Cmd key as you move the object. To turn it off permanently, use the Preferences dialog. When an object is moved smart guides are displayed automatically to position objects more accurately.
The commands Move to Center (Horizontally) and Move to Center (Vertically) from the Format menu move the selected objects to the page center along the horizontal or vertical axis.
Size and Orientation
The size of an object can be changed using the mouse: select the object and drag one of the handles on its border. To resize an object preserving its aspect ratio, use the corner resize handles. Side handles resize that particular side only. To inverse the action of corner handles, hold the Shift key down.
On the Geometry tab you can enter the dimensions of the object to make it exactly the same size as needed. The units of measure can be changed in the program's Preferences.
When you set a new size and Fix aspect ratio is checked, the proportion between the sides will be preserved.
If an image size was increased or decreased, you can always restore the original size using Original Size button.
For a selected object you can set the rotation angle in the Rotate section, and use vertical or horizontal flipping. Text cannot be flipped.
Several images can be resized and rotated together. When you resize a group of selected images, it behaves as a single image. When you rotate a group of images, they move around the center of the selection.
Border Line, Filling and Shadow
Border lines can be made visible/invisible by using the Line checkbox on the Fill & Shadow tab of Inspector.
Use the Color button to open the standard Colors panel to change line color and opacity.
Adjust the thickness of the line using the Thickness slide bar.
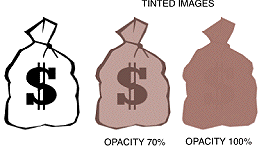
You can tint (fill) an object using the Fill checkbox on the Fill & Shadow tab of Inspector or using Tint image on the Image tab.
Use the Color button to open the standard Colors panel to change tint (fill) color.
Adjust the opacity of the tint using the Opacity slider.
The result of Tint depends on the object it was applied to.
Images look like they are tinted when Opacity is about 20-70%.
If Opacity is more than 95%, the image can be considered as filled. This is used mostly for Smart Shapes and Basic Shapes.
If you select text and check Fill with some color, the background of the text will be of that color.
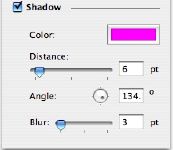 If Shadow is checked on the Fill & Shadow tab of Inspector, a shadow of the selected color will appear for the selected object. The distance between the object and the shadow, its angle and blur can be also adjusted with the help of the respective controls. To change the color and opacity of the shadow, open the Colors panel by clicking on the Color button in the Shadow section.
A shadow can be also added to text (to the letters), if you select a portion of text or a text box and apply the shadow as described above.
To set the same border line, filling or shadow attributes for several objects, apply the settings to a group of selected objects.
Objects Alignment
The Alignment tab of Inspector has several options for aligning objects. Select two or more objects and click one of the alignment buttons. You can align Left Edges, Right Edges, Top Edges and Bottom Edges. You can also align the centers of the objects vertically or horizontally.
If you need to align several objects, select them first. Open the Alignment tab of Inspector and select the kind of alignment you need. The same commands you can find in the menu: Format/Align.
Distribute Objects
The commands from the Format/Distribute menu and the Distribute section of the Alignment tab of Inspector affect how the selected objects are distributed on a page. These commands are used to create equal spacing between objects, and can only be used for three or more objects.
- Distribute/Spacing Horizontally creates equal horizontal spacing between the edges of the objects.
- Distribute/Spacing Vertically creates equal vertical spacing between the edges of the objects.
- Distribute/Centers Horizontally creates equal horizontal spacing between the centers of the objects.
- Distribute/Centers Vertically creates equal vertical spacing between the centers of the objects.
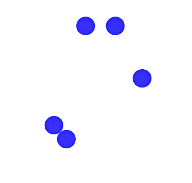
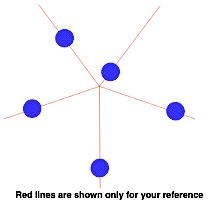
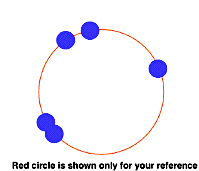
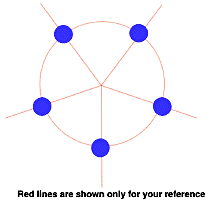
The right button places the centers of the object on an imaginary circle. The distances between the objects may be different and depend on their original position.
If you apply both commands one after another, the objects will be placed on an imaginary circle and the distances between them will be equal.
When you create objects, each subsequent object is located one level higher. That is, when you move one object over another one, the one which is on an upper level will cover the "lower" object. These commands help to change the order in which objects are displayed.
Sometimes you may need to place one object behind another. This is especially convenient when you use an image as a background. Use the Send Backward/Bring Forward commands from the Format menu for this purpose. The Send Backward command puts the selected object behind all other objects. The Bring Forward command places it in front of all other objects.
In some cases you may need to select an object that is fully covered by another one and can't be seen. For instance, to resize or move an image used as the background for text. The easiest way to access lower objects is using the throughout selection.
If you need to bring a lower object to the front, select it as described above and choose the Format/Bring to Front menu command.
 If Shadow is checked on the Fill & Shadow tab of Inspector, a shadow of the selected color will appear for the selected object. The distance between the object and the shadow, its angle and blur can be also adjusted with the help of the respective controls. To change the color and opacity of the shadow, open the Colors panel by clicking on the Color button in the Shadow section.


