www.belightsoft.com/.../roxioedition.php Start of Help > Modifying Documents

Making Collages

(the standard version is required)

Collage templates

When creating a design with picture collage, you usually assemble images in a particular order (even if they look to be placed at random). Once a proper size and location for each image are found, you may want to use the design with new images in place of existing ones.

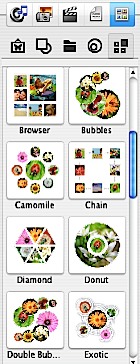
The technology introduced in Disc Cover allows to use saved collage templates with new images. Collages are based on filling Smart Shapes with images. Images from the Smart Shape collection are used as place holders (image frames) in the design. Additionally to this, they make different image boundary shape.

The program is supplied with collage design templates.

To make a collage from a template:

  1. Open the Collage panel (menu: Window / Clipart / Collage).
  2. Click on a collage template or drag it into your design.
  3. Select an image place holder and drag a new image inside it from the Clipart or Source panel. To insert an image from a graphic file, select it via the Browse button from the Fill & Shadow tab of Inspector.
    Repeat this with other images.

If needed, adjust the way the image fills its frame (use Scale type options).

To make a collage from scratch:

  1. Open the Smart Shape collection in Clipart (menu: Window / Clipart / Smart Shapes).
  2. Open the Fill & Shadow tab of the Inspector window (menu: Window / Inspector / Fill & Shadow).
  3. Add several Smart Shapes into your design. Select them, set the Fill option. Click the Color Fill drop-down list and select Image Fill.
  4. Fill Smart Shapes with images: select a frame and drag an image inside it.
  5. If you want to make images replaceable at a later import, select them, go to the Format / Image menu and click Replace image at import.